Couchbase log appender
The Couchbase log appender is used to transfer logs from the Operations service to the Couchbase database.
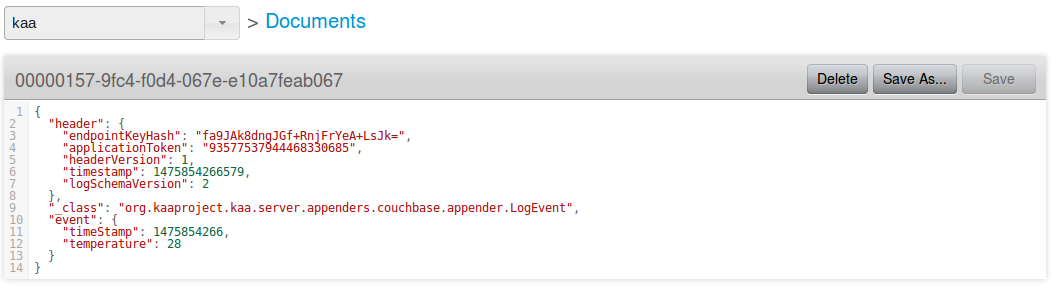
Each log document consists of the following fields:
- id – randomly generated UUID string.
- header – contains log metadata:
endpointKeyHash– identifies the endpoint that produced the log record.applicationToken– application identifier.headerVersion– version of the log header, currently equals 1.timestamp– timestamp in milliseconds showing when logs were uploaded to the key/value storage.
- event – log body (log item, received from a client).
The values are stored as serialized generic records using record wrapper Avro schema.
Create Couchbase log appender
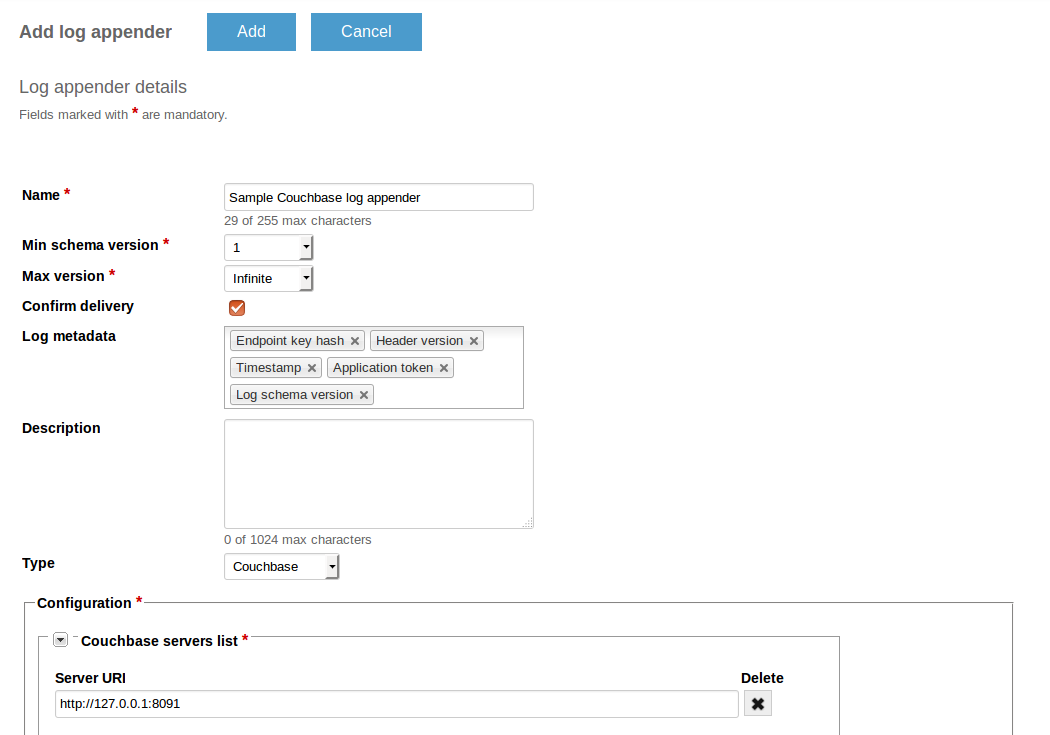
To create a Couchbase log appender for your application using the Administration UI:
-
Log in to the Administration UI page as a tenant developer.
-
Click Applications and open the Log appenders page of your application. Click Add log appender.
-
On the Log appender details page, enter the necessary information and set the Type field to Couchbase.
-
Fill in the Configuration section for your log appender and click Add. See Configure log appender.
Alternatively, you can use the server REST API to create or edit your Couchbase log appender.
The following example illustrates how to create an instance of Couchbase log appender using the server REST API.
curl -v -S -u devuser:devuser123 -X POST -H 'Content-Type: application/json' -d @couchbaseLogAppender.json "http://localhost:8080/kaaAdmin/rest/api/logAppender" | python -mjson.tool
where file couchbaseLogAppender.json contains the following data.
{
    "pluginClassName":"org.kaaproject.kaa.server.appenders.couchbase.appender.CouchbaseLogAppender",
    "pluginTypeName":"Couchbase",
    "applicationId":"5",
    "applicationToken":"82635305199158071549",
    "name":"Sample Couchbase log appender",
    "description":"Playing with Couchbase log appender",
    "headerStructure":[
        "KEYHASH",
        "VERSION",
        "TIMESTAMP",
        "TOKEN",
        "LSVERSION"
    ],
    "maxLogSchemaVersion":2147483647,
    "minLogSchemaVersion":1,
    "tenantId":"1",
    "jsonConfiguration":"{\"couchbaseServerUris\":[{\"serverUri\":\"http://127.0.0.1:8091\"}],\"bucket\":\"kaa\",\"password\":{\"string\":\"\"}}"
}
Below is an example result.
{
    "applicationId": "5",
    "applicationToken": "82635305199158071549",
    "confirmDelivery": true,
    "createdTime": 1466071152031,
    "createdUsername": "devuser",
    "description": "Playing with Couchbase log appender",
    "headerStructure": [
        "KEYHASH",
        "VERSION",
        "TIMESTAMP",
        "TOKEN",
        "LSVERSION"
    ],
    "id": "65551",
    "jsonConfiguration": "{\"couchbaseServerUris\":[{\"serverUri\":\"http://127.0.0.1:8091\"}],\"bucket\":\"kaa\",\"password\":{\"string\":\"\"}}",
    "maxLogSchemaVersion": 2147483647,
    "minLogSchemaVersion": 1,
    "name": "Sample Couchbase log appender",
    "pluginClassName": "org.kaaproject.kaa.server.appenders.couchbase.appender.CouchbaseLogAppender",
    "pluginTypeName": "Couchbase",
    "tenantId": "1"
}
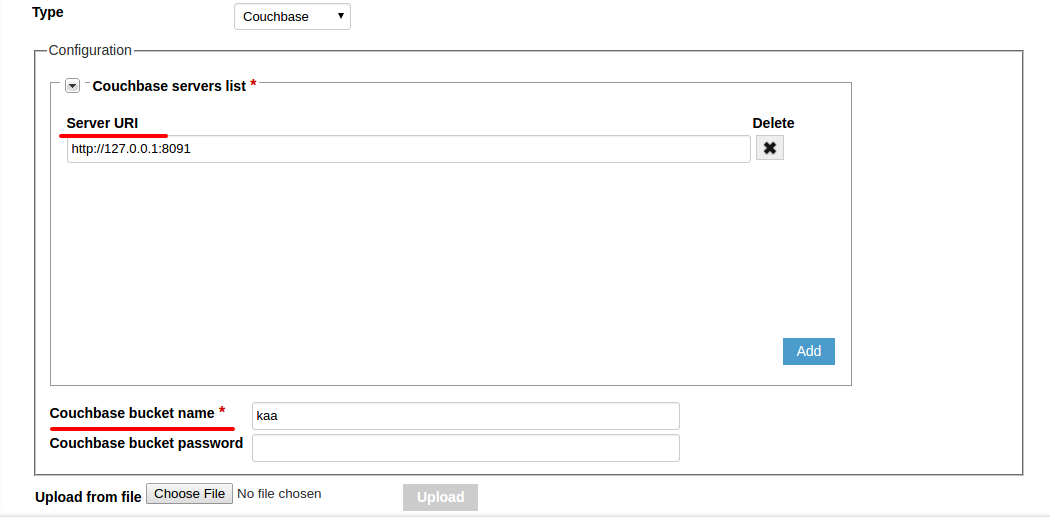
Configure log appender
The Couchbase log appender configuration must match this Avro schema.
Below is an example configuration that matches the mentioned Avro schema.
{
    "couchbaseServerUris":[
        {
            "serverUri":"http://127.0.0.1:8091"
        }
    ],
    "bucket":"kaa",
    "password":null
}
Playing with Couchbase log appender
The example below uses the Data collection demo from Kaa Sandbox.
To play around with the the Couchbase log appender:
-
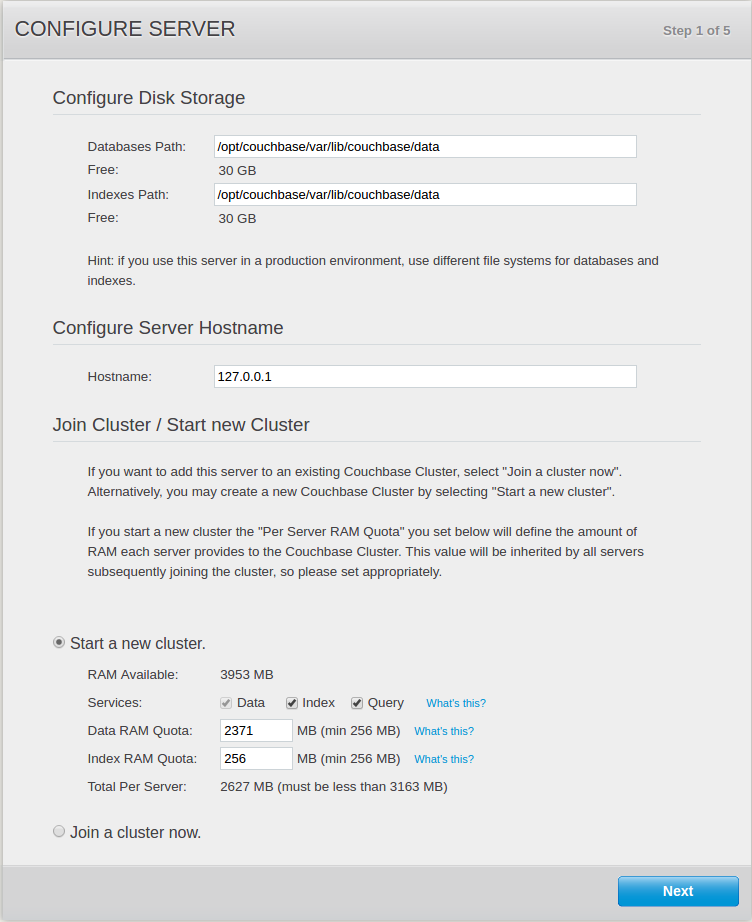
Download and install Couchbase.
-
Open your browser at http://your host name:8091/ and click the Setup button.
-
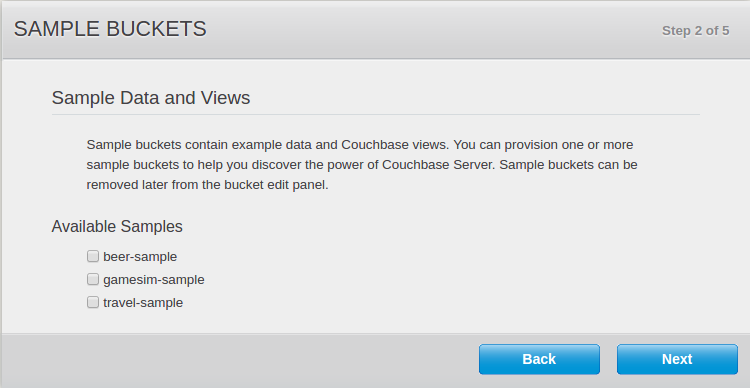
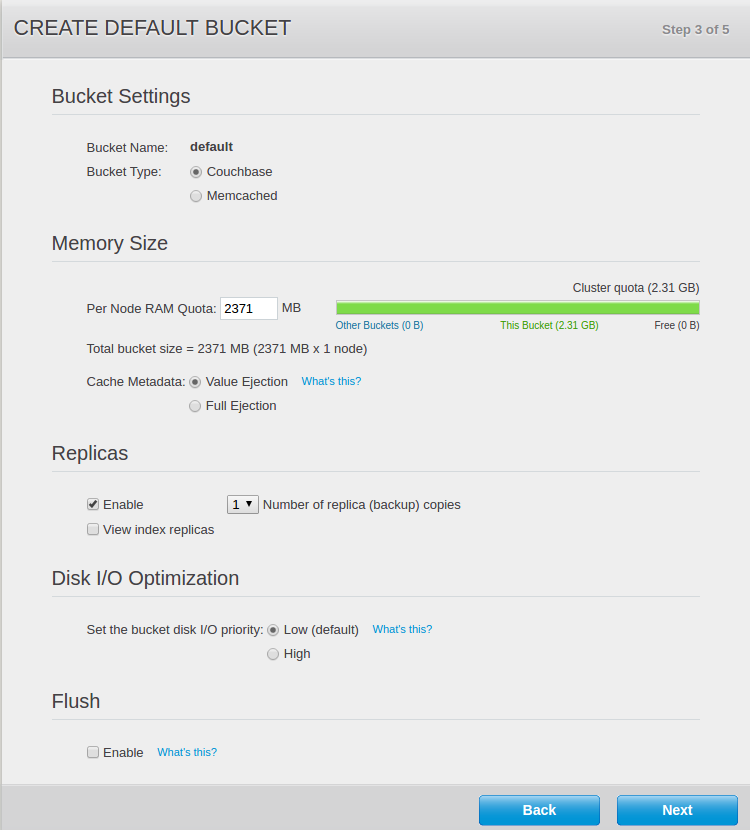
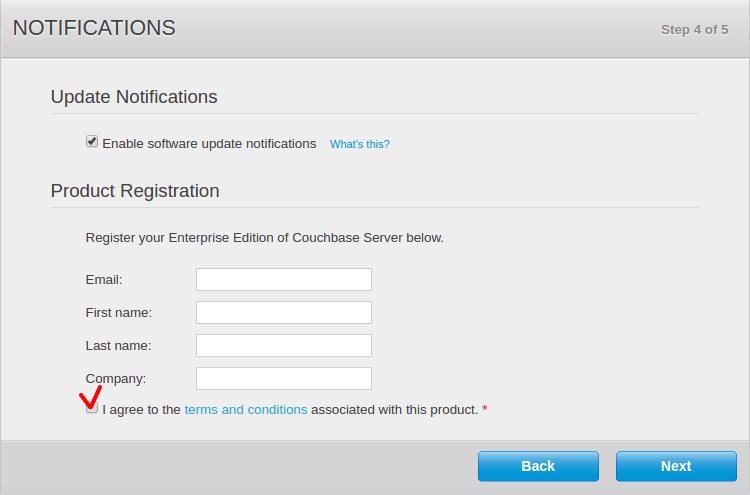
Click Next on the following pages.
-
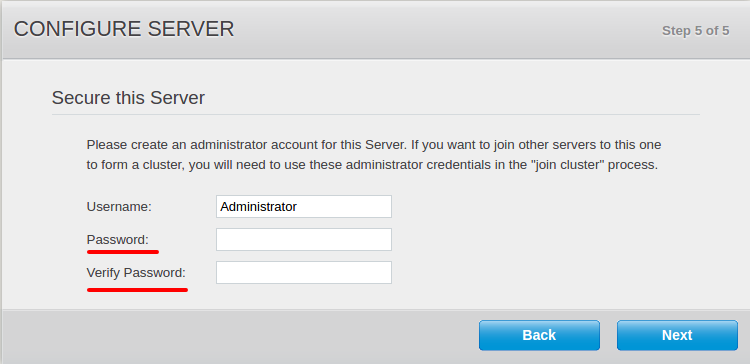
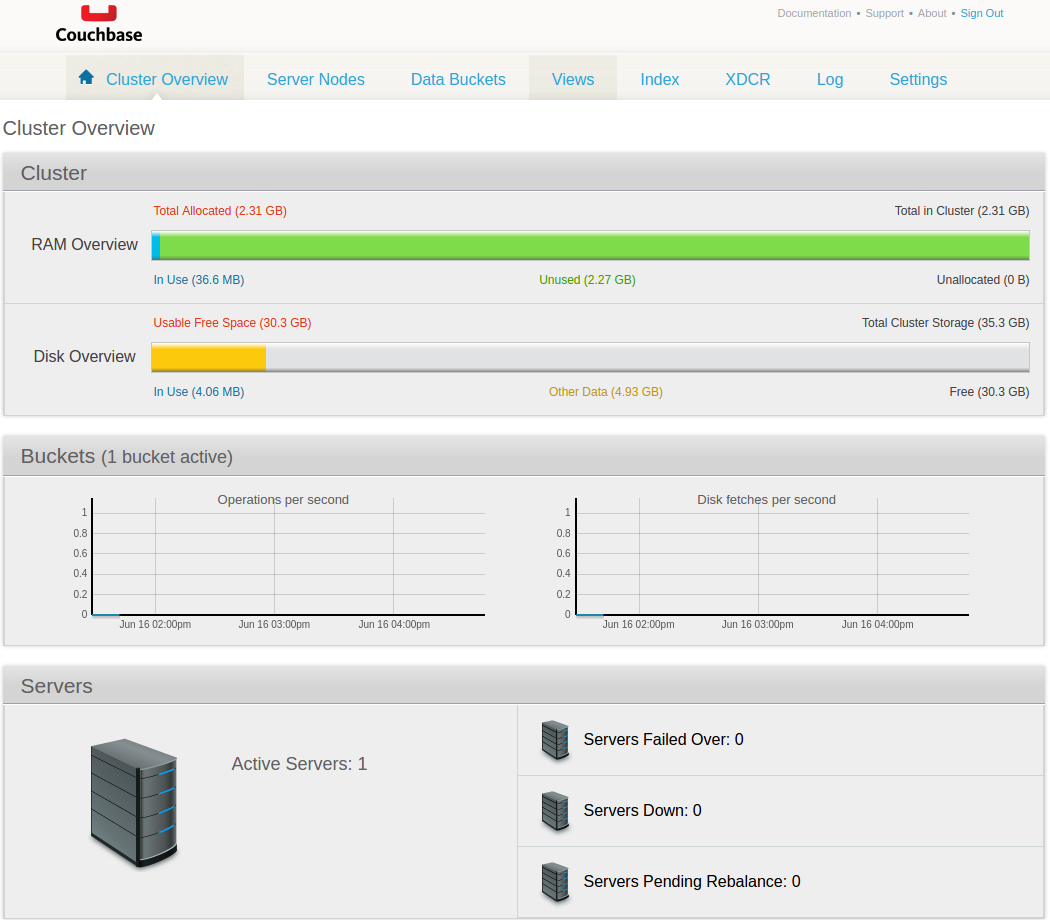
After you created your administrator account for the server, the Cluster Overview page will open.
-
Open Kaa Sandbox, log in to the Administration UI, and specify the URL and bucket to be used for receiving logs.
-
Open the Data collection demo from Kaa Sandbox, follow the application installation instructions, and run the application.
-
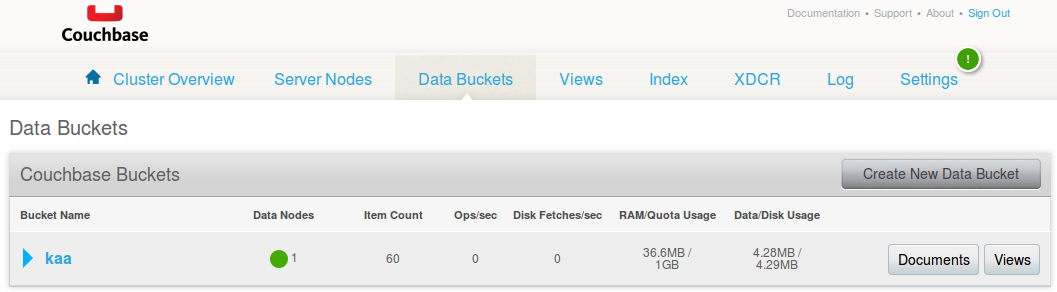
Go to http://your host name:8091, click Data Buckets, then click the Documents button of your bucket.
-
Because you launched the Data collection demo application before, your output should be similar to the example below.
-
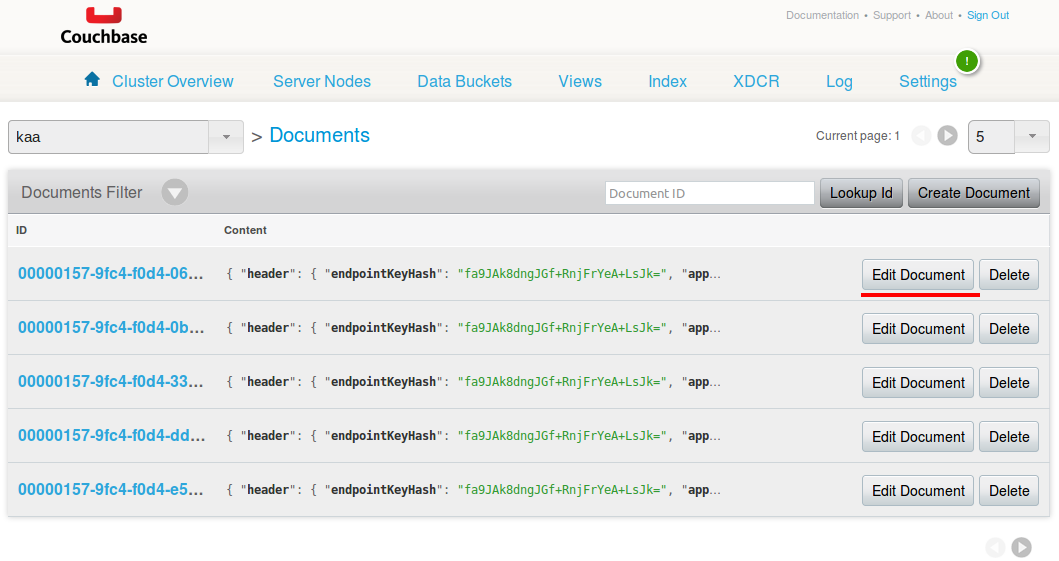
Click Edit Document to access the contents of the log document.
If you don’t get the desired output or experience other problems, see Troubleshooting.